Star Micronics TSP143IIIW WiFi Printer Setup on Android
Overview
Before you can use the Star TSPP100 Printer on your Android device, you will have to configure it and set it up with RetailTime POS.
1. Connect to the network
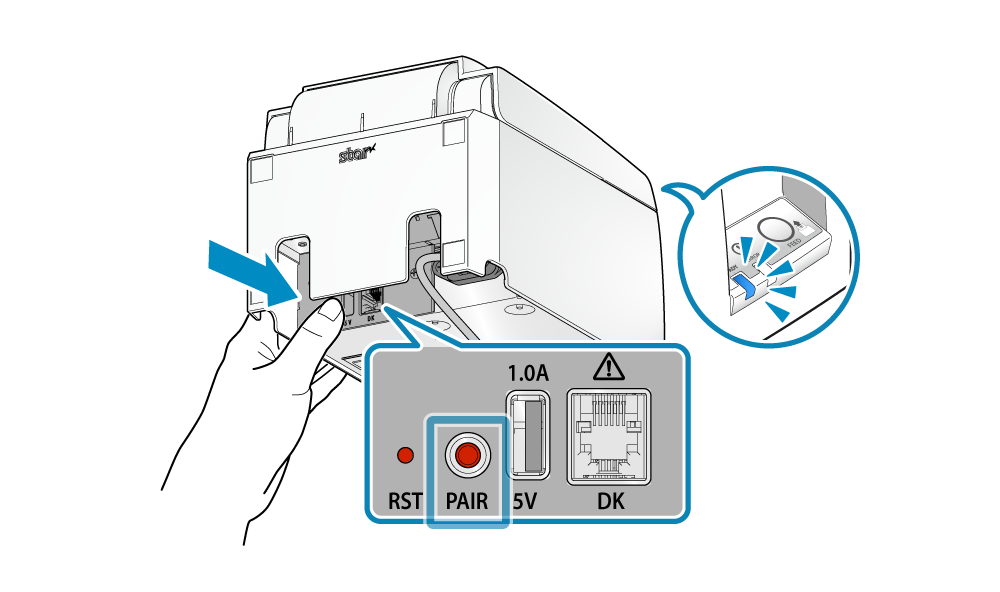
- Press and hold the PAIR button until the LED (blue) button of the printer blinks.
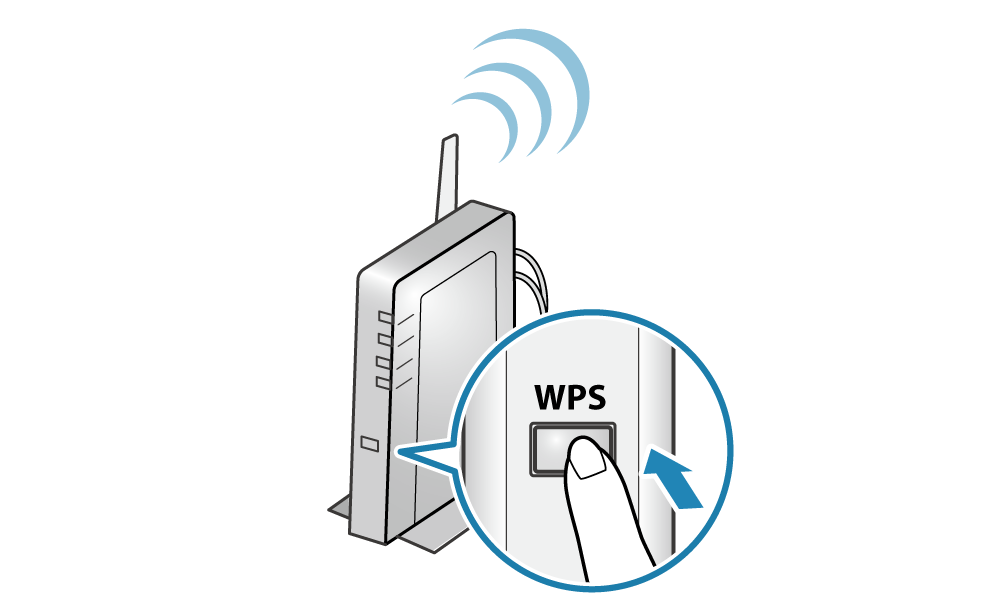
- Press the WPS button of the access point or router.
Note
The usage procedure of the access point or router will vary according to the device.
When configuring, make sure to refer to the documentation of the corresponding device.
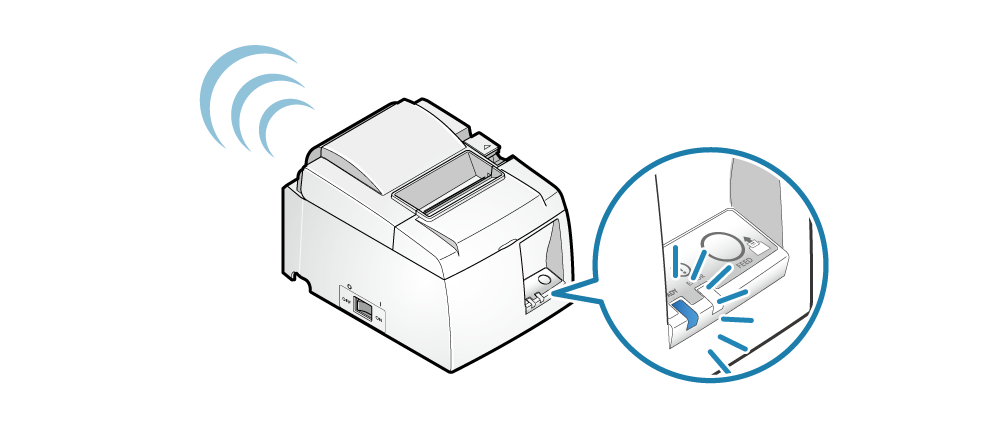
- When a network connection is established, print out the connection details, and the LED of the printer will stop blinking and stay lit.
- 2. Download printer utility
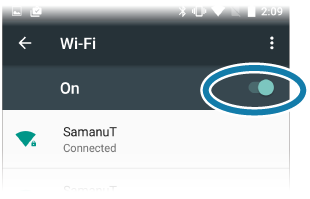
- Open the setting screen of the tablet and select WiFi and turn it ON.
3. Select the printer from TSP100III Utility, and open the setting screen
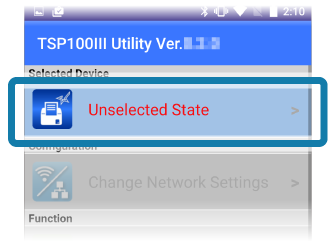
- Check the printer’s power is on, and open TSP100III Utility.
- Tap [Unselected State] from "Selected Device".
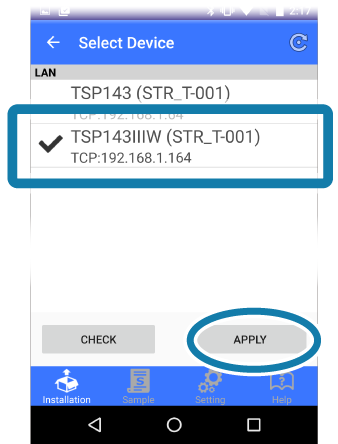
- From the Select Device list , select the device you want to connect and then tap [Apply].
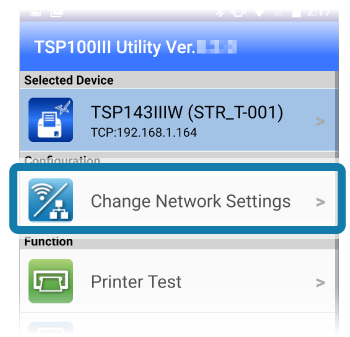
- Tap [Change Network Settings].
This connects to the selected printer and opens the Web Configuration.

Note
If there is a printer that has already been selected, tap the printer that is displayed in "Selected Device".
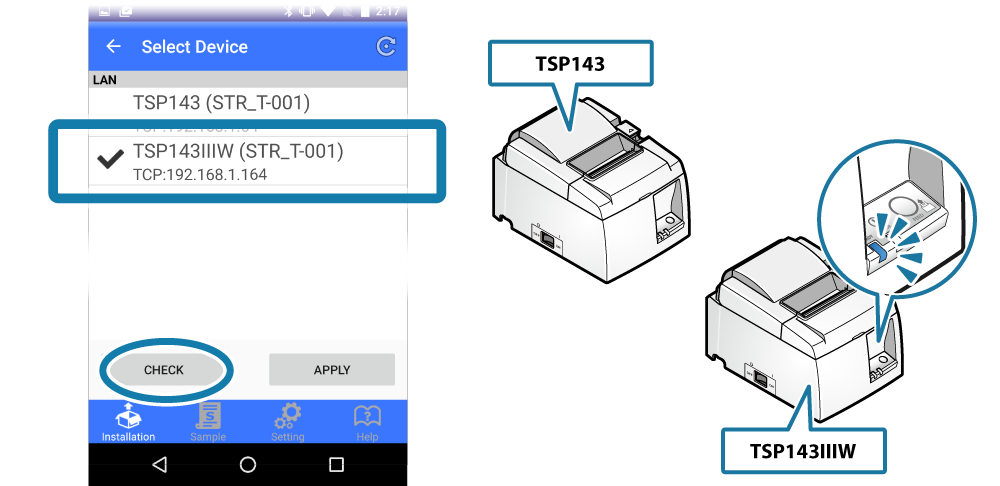
Note
Tap [Confirm] and the printer’s LED (blue) will flash, and you can check the selected printer.
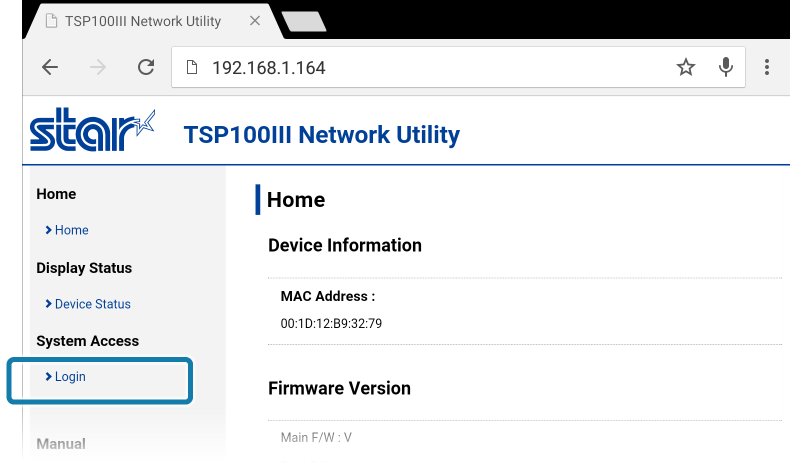
4. Log into Web Configuration
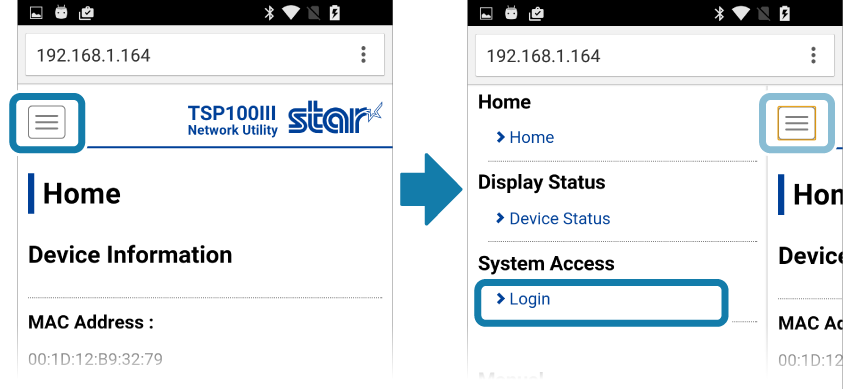
- If you have changed the password, open [Login] from the menu displayed on the left side of the setting screen, or the menu button
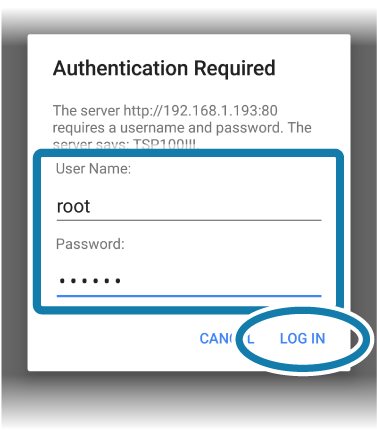
 displayed on the upper left, and login with: Login name: root / password: [Changed password or the default password (public)].
 - The default login name and password are as follows:
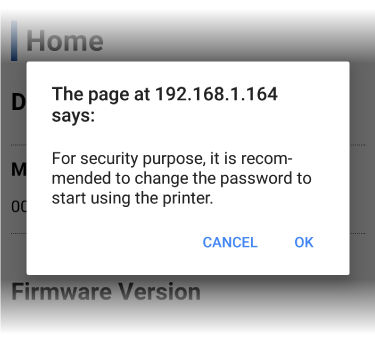
- The following message is displayed when you are using the default password. Select [OK] to change the password or [Cancel] to not change the password.
If [OK] is selected, a screen to change the password will open. After changing the password, return to the following step.
Note
Login name: root
Password: public
Note
For security purposes, it is recommended to change the password when using the printer.
1. Log in to RetailTime app.
2. In the left navigation menu, tap on Settings--->Printer Setup
3. On the Printer Setup screen, tap Search for a printer on the top right.
4. The Star TSP100 WiFi printer should show up under both Receipt Printers and Kitchen Printers. Check off the box(es) of whichever one(s) you would like to set up your printer to print.
Note: For kitchen receipts to print, you must select the Kitchen Receipt option in the Receipt tab of your Back Office Store Settings.
- For info on setting up directional printing for your kitchen printers, please see https://bizsupport.bizsupport.link/portal/en/kb/articles/directional-printing-for-kitchen-printers-16-12-2021
5. Choose either 80mm or 58mm as the paper width for both printer types.
6. The option Print Test Page will appear to the right of the printer. Tap it to print a test page to ensure that the printer is set up properly.
7. Confirm your printer settings by tapping the DONE button. The printer should now be set up to work on your Android device.
Related Articles
Star Micronics TSP143IIIW WiFi Printer Setup on Windows
Overview Before you can use the Star TSPP100 Printer on your Windows device, you will have to configure it and set it up with RetailTime POS. Instructions 1. Connect to the network Press and hold the PAIR button until the LED (blue) button of the ...RetailTime BTP-R180II Printer Setup on Android
Connecting RetailTime BTP-R180II Printer to Android 1. On the back of the printer, input the printer power source cord into the leftmost plug-in and plug it into to an outlet. 2. Input the ethernet router to the back of the printer, above where it ...Star TSP100 LAN Printer Setup in POS
Overview Once it is set up, you can use the Star TSP100 LAN Printer with RetailTime app on Android, iPad, Windows, and Poynt devices. Connecting Star TSP100 LAN Printer to Tablet 1. On the back of the printer, input the printer power source cord ...Star Bluetooth TSP100III Printer Setup on Android
Overview Before you can use the Star Bluetooth TSP100III Printer on your Android device, you will have to configure it and set it up with RetailTime. Connecting Star Bluetooth TSP100III to Android 1. Switch printer on by pressing the on switch. 2. ...Setting Up Label Printer StarM mC-Print3 with POS
Overview The supported model is StarM mC-Print3 MCL32CBI (part number 39658310). Multimedia: Prints on linerless label (permanent & sticky), die-cut label, continuous label, thermal receipt One Touch Label stores pre-made receipts & labels for easy ...